


Car scratches are inevitable—from shopping carts, branches, or minor dings—but many can be fixed at home without a costly trip to the body shop. In 2026, with better DIY products like advanced polishing compounds and touch-up kits, you can achieve professional-looking results on clear coat and light paint scratches. This guide covers how to assess damage, choose the right method, and follow safe steps for minor to moderate scratches. Always test products on a small hidden area first, work in shade, and if the scratch exposes bare metal or is very deep, consult a professional to avoid rust or mismatched paint.
Types of Car Scratches and What You Can Fix DIY
Understanding scratch depth determines your approach:

- Clear Coat Scratches: Shallow, only affect the protective top layer. Fingernail doesn’t catch. Easy DIY with polish.
- Paint (Base Coat) Scratches: Deeper, color layer exposed but primer intact. Fingernail catches lightly. Needs compound + possible touch-up.
- Deep/Primer Scratches: Reach primer or metal. Visible rust risk. DIY possible with sanding, primer, paint pen, and clear coat, but pros often recommended for seamless results.
For most everyday scratches, start with assessment: Run your fingernail over it—if it doesn’t snag, it’s likely clear coat only.
Tools and Materials You’ll Need
Gather these for best results (available at auto stores or online):
- Car wash soap and microfiber cloths/towels
- Scratch remover/polishing compound (e.g., Meguiar’s ScratchX, Turtle Wax Premium, or Chemical Guys VSS)
- Rubbing compound for deeper marks
- Touch-up paint pen (match your car’s color code from door jamb)
- Clear coat pen or spray
- Wet/dry sandpaper (1500–3000 grit for light, finer for finish)
- Dual-action polisher (optional, speeds up work) or foam applicator pads
- Car wax or sealant for protection
- Masking tape, gloves, and isopropyl alcohol
Step-by-Step: How to Remove Light Clear Coat Scratches
For surface-level swirls and light marks:
- Wash and Prep the Area: Clean the car with soap and water to remove dirt. Dry thoroughly. Tape off surrounding areas with masking tape to avoid accidental buffing.
- Clay Bar (Optional but Recommended): Use detailing clay with lubricant to remove contaminants that could scratch further.
- Apply Scratch Remover: Put a small amount of polish/compound on a microfiber applicator or pad. Work in small sections (2×2 ft) with circular motions or light back-and-forth pressure for 1–2 minutes.
- Buff Off Residue: Wipe clean with a fresh microfiber towel. Check progress—repeat if needed. For machine polishers, use low speed to avoid heat damage.
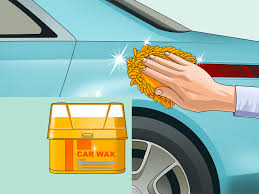
- Protect the Finish: Apply wax or sealant over the area for shine and UV protection.
Time: 20–45 minutes per panel. Results: Scratches often disappear or become nearly invisible.
Step-by-Step: Fixing Deeper Paint Scratches
For scratches that catch your nail:
- Clean Thoroughly: Wash, dry, and degrease with isopropyl alcohol.
- Light Sanding (If Needed): Use 2000–3000 grit wet sandpaper with water. Sand gently in one direction until smooth—don’t go through to primer.
- Apply Touch-Up Paint: Shake paint pen well. Dab or brush into the scratch (thin layers). Let dry 10–30 minutes between coats. Build up flush with surface.
- Sand Smooth: Once dry (24 hours ideal), wet sand lightly with 2000+ grit to level with surrounding paint.
- Add Clear Coat: Apply clear coat pen or spray in thin layers. Dry fully, then wet sand/polish for blend.
- Polish and Wax: Use compound to blend, then wax the whole panel.
Tip: For best color match, get OEM touch-up from dealer. Patience is key—rushing causes visible repairs.
Best Products for Scratch Removal in 2026
Top-rated options from recent tests:
- Meguiar’s Scratch Eraser Kit: Great for beginners with pads and compound.
- Turtle Wax Premium Scratch Repair Kit: Affordable, effective for moderate scratches.
- Chemical Guys VSS or similar: Versatile for swirl marks and light scratches.
- Formula 1 Scratch Out: One-step quick fix for minor issues.
Avoid household hacks like toothpaste (too abrasive long-term) or WD-40 (temporary at best).
Safety Tips and When to Go Pro
– Work in shade/cool conditions to prevent compound drying fast.
– Wear gloves to avoid skin irritation.
– Don’t over-sand—can thin clear coat.
– For deep gouges, rust, or large areas, professional paintless dent repair or body shop is safer (costs $100–500+).
– Prevent future scratches: Use ceramic coating, park carefully, and wash regularly.
Conclusion
Removing car scratches DIY saves money and restores your vehicle’s look—light ones often vanish with polish, while deeper ones need careful layering. Start simple: wash, assess, polish, and protect. With practice and quality products, you’ll get impressive results at home. Test on a small spot first, be patient, and enjoy the satisfaction of a smoother finish. Got a stubborn scratch? Consider pro help to keep your paint pristine. Drive safe!